Desktop devices
recommended.
ABMDI Continuing Education Credit Hours: 6.25
Cost: $149
Self-paced online course
Access time to complete: 6 months
External exam
Autopsy Procedure
About the Basic Autopsy Procedure course
The Basic Autopsy Procedure course*
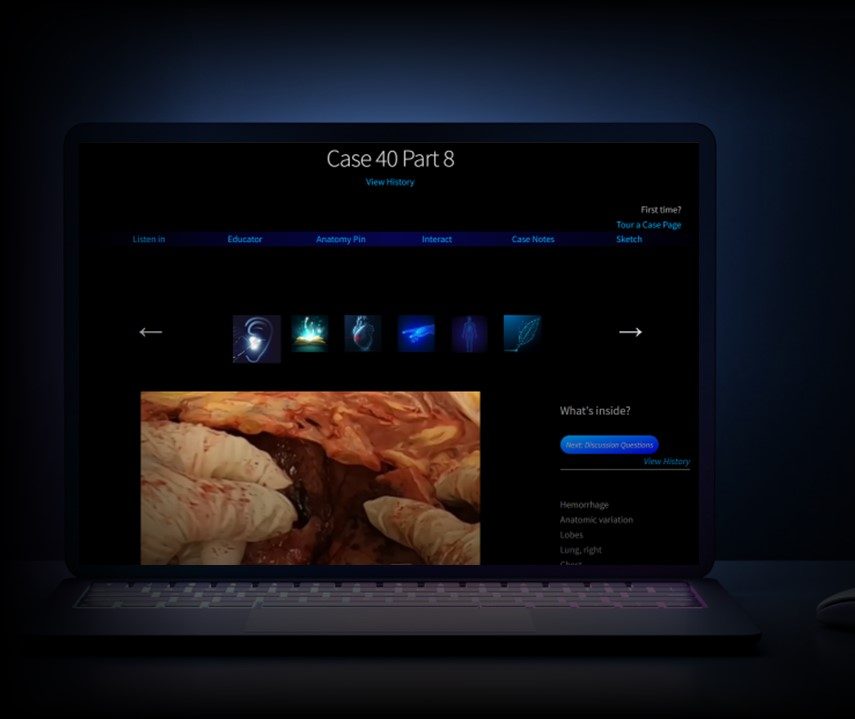
- makes use of consented, real-case video footage
- introduces principles of autopsy work
- includes practice with real external exams and
- covers safety and technique.
After completing the course, Death Investigators, Pathologists, Pathology Assistants (and others) will have
- improved ability to follow (or perform) autopsy casework
- sharpened observation skills assessing external examinations
- increased fluency participating with
- the public
- decedent families
- pathologists and
- other professionals
- broader and deeper understanding of the human condition, especially when medical issues or treatment impact (or confound) casework.
*The course covers medical-type (hospital) autopsies. It does not cover forensic-type cases, per se. However, there is training in external examination, including decomposition. The skills taught in the course are fundamental to all autopsies, regardless of case type.
Preview
(Desktop recommended)

End of preview
Course Outline
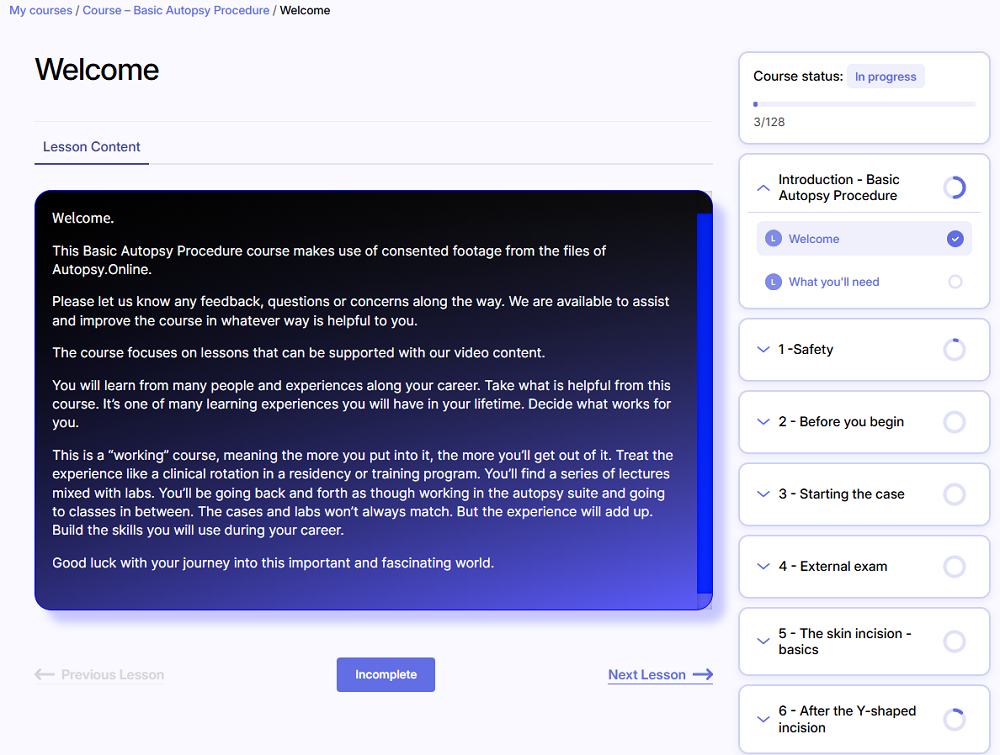
Introduction – Basic Autopsy Procedure
Important – Terms and Privacy
Important – About access
How the course fits in with your career. Feedback.
What you’ll need
Keep a vocabulary list
Guided research
Tip: About the videos
Tip: More about the videos
Completing the course. Downloading your Course Completion Certificate
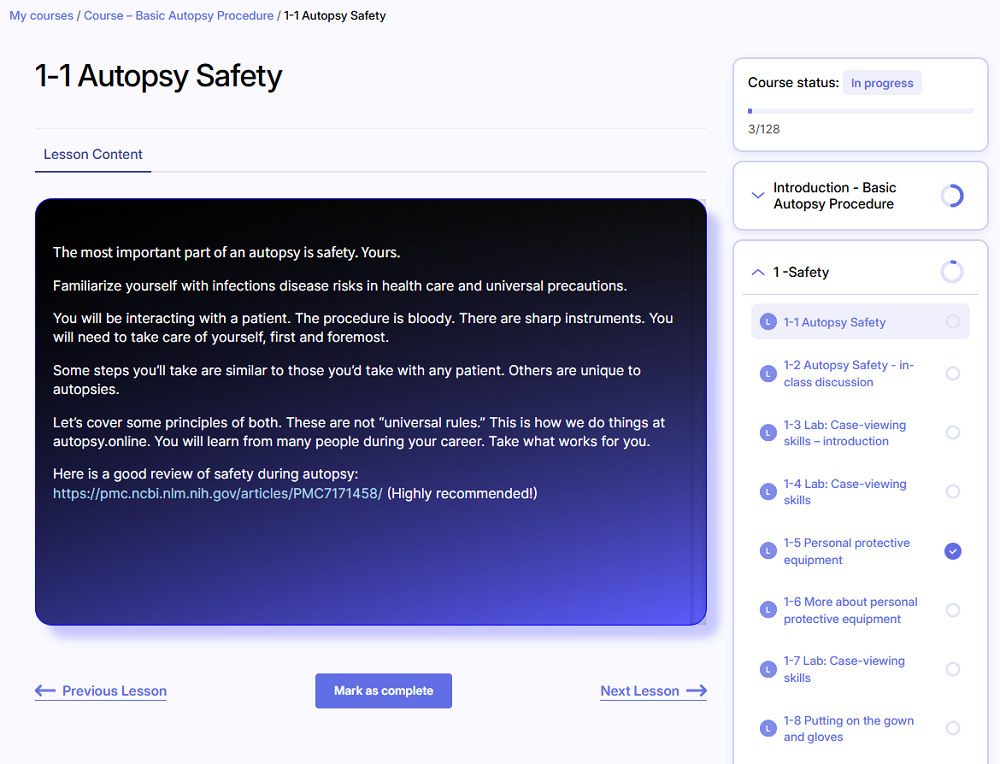
1 -Safety
1-2 Autopsy Safety – discussion
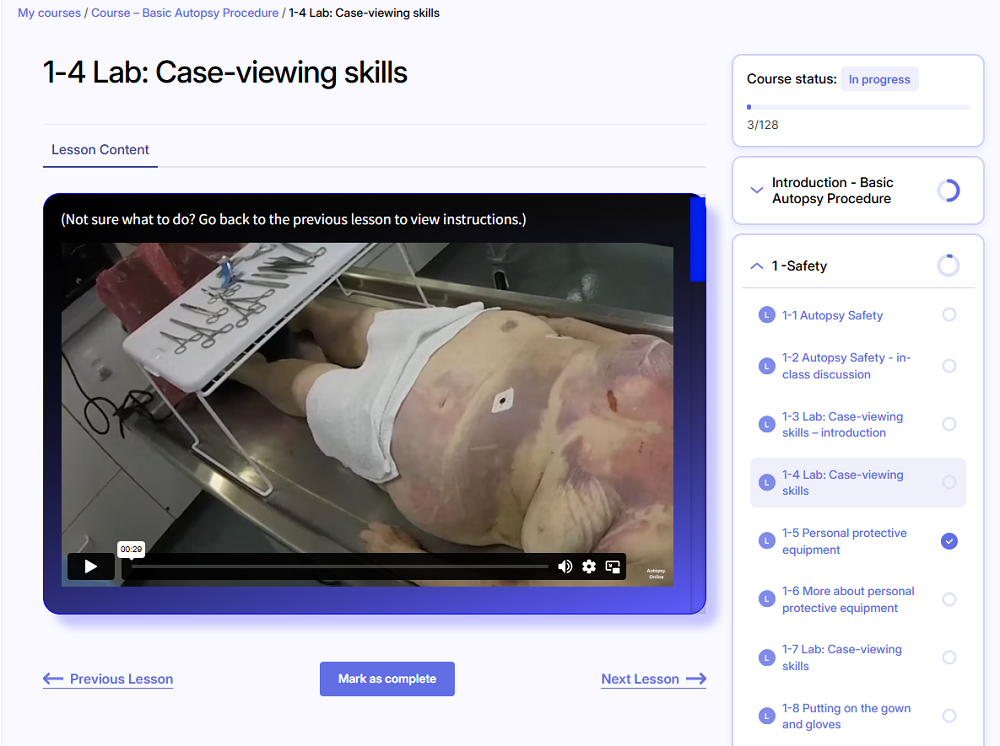
1-3 Lab: Case-viewing skills – introduction
1-4 Lab: Case-viewing skills
Vocabulary reminder
1-5 Personal protective equipment
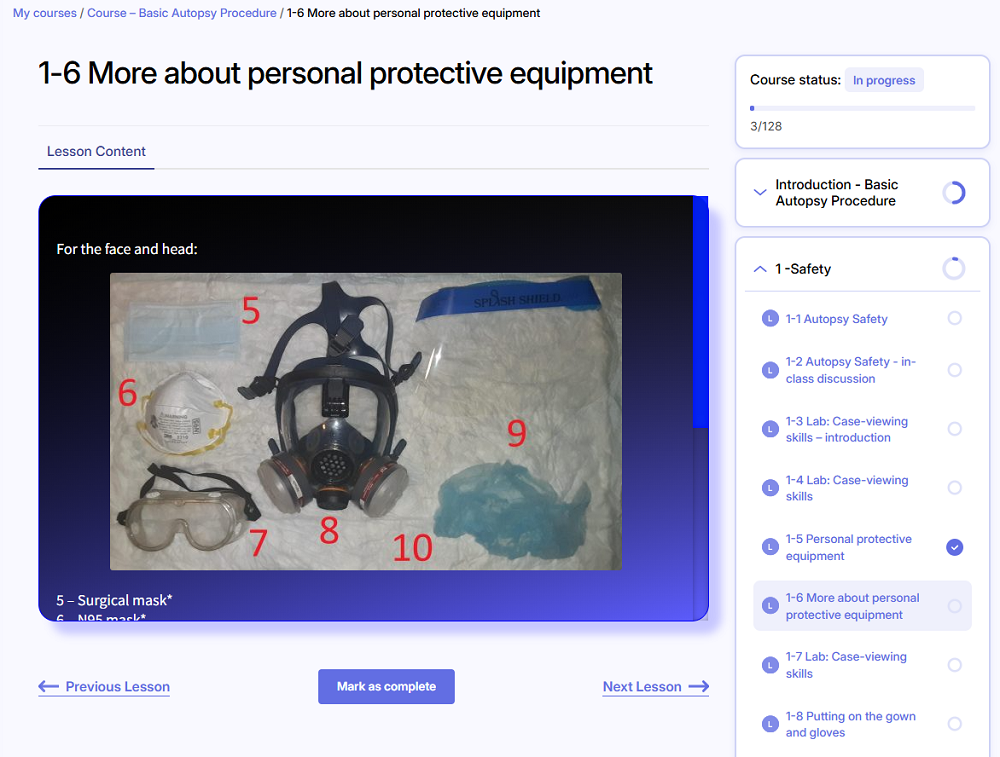
1-6 More about personal protective equipment
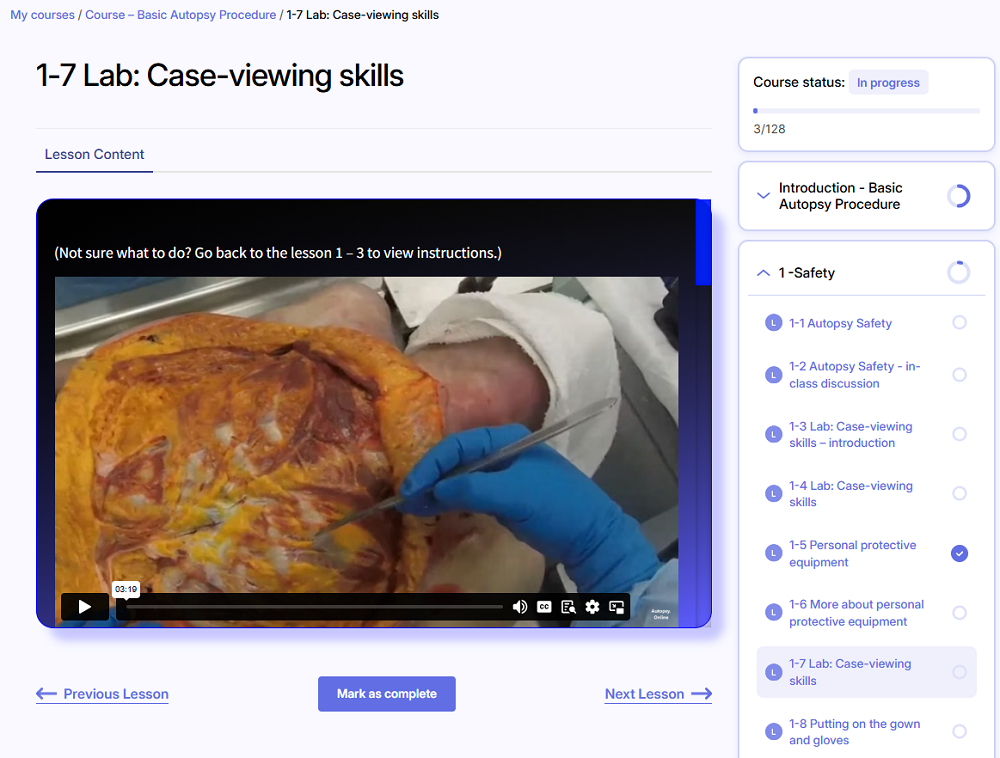
1-7 Lab: Case-viewing skills
Vocabulary reminder
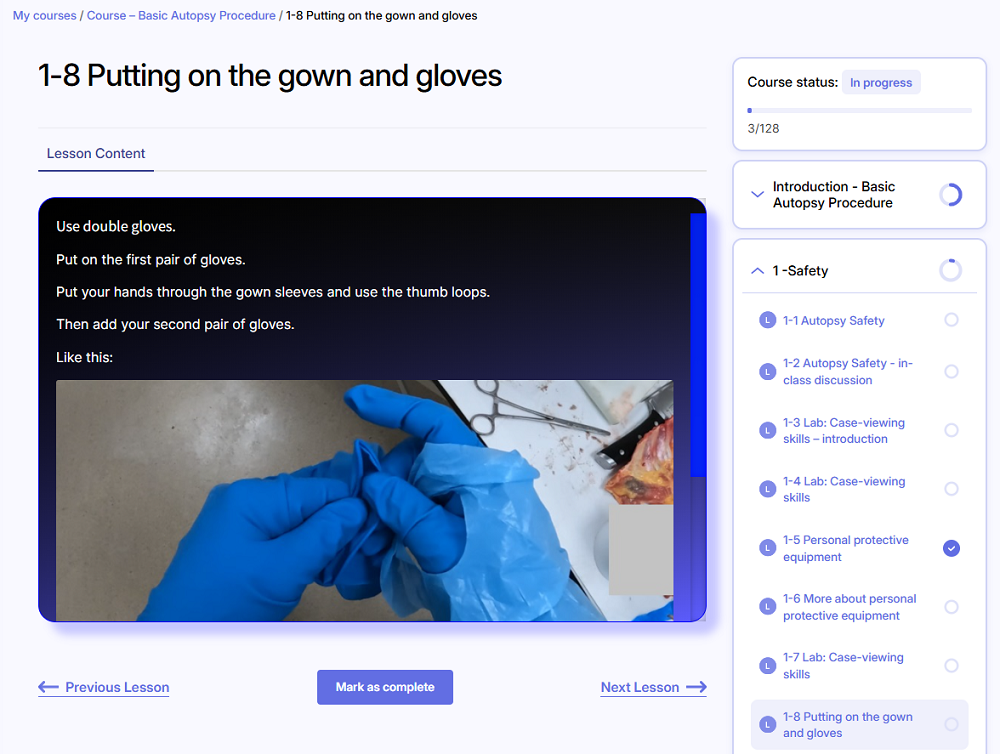
1-8 Putting on the gown and gloves
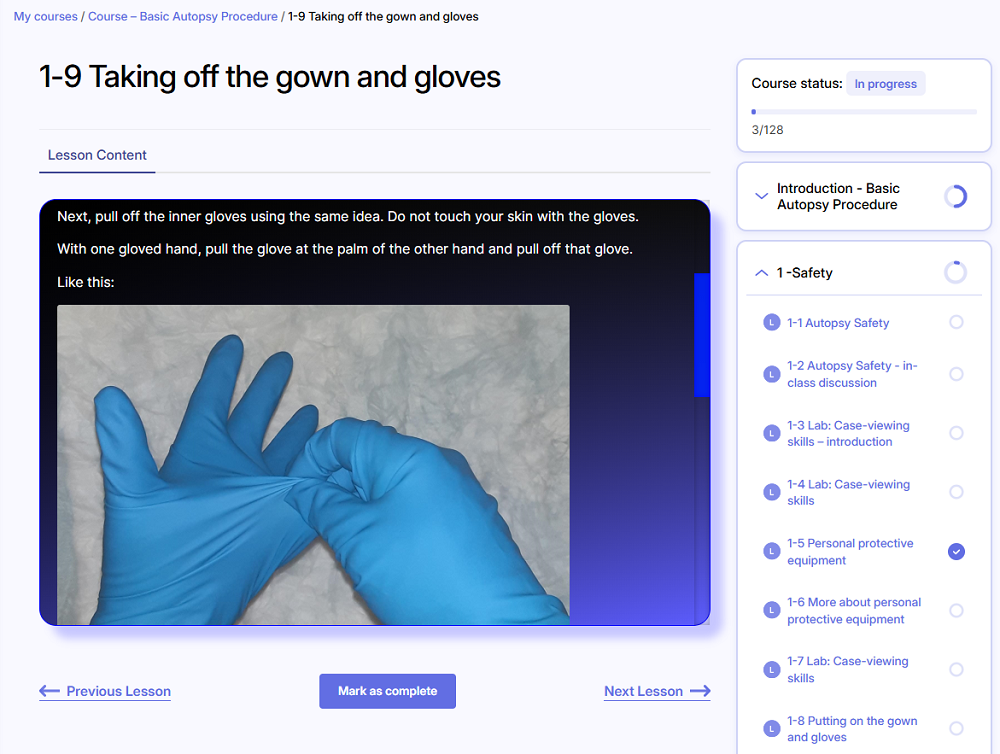
1-9 Taking off the gown and gloves
1-10 Lab: Case-viewing skills
1-11 Putting on the scalpel blade
1-12 Taking off the scalpel blade
Vocabulary reminder
1-13 More about preventing scalpel sticks
1-14 Lab: Case-viewing skills
1-15 Long knives
1-16 Preventing needle sticks
1-17 Lab: Case-viewing skills
1-18 Sharp ribs
1-19 Pacemakers
1-20 Lab: Case-viewing skills
1-21 Take care of your back
1-22 Splashes
1-23 Lab: Case-viewing skills
1-24 Attitude
2 – Before you begin
2-2 Who has legal rights?
2-3 More about consents – See it yourself!
2-4 Lab: Case-viewing skills
2-5 The medical history
2-6 Planning the case
2-7 Lab: Case-viewing skills
2-8 Stay grounded, stay cautious.
2-9 Practice evidence-based thinking
2-10 Get into your mindset – remember, the patient (usually) has a family
2-11 Lab: Case-viewing skills
2-12 Basic set-up: Safety and working space
2-13 Basic set-up: Your equipment
2-14 Lab: Case-viewing skills
2-15 Basic set-up: Table and patient position
2-16 Lab: Case-viewing skills
2-17 Documentation
3 – Starting the case
3-2 Lab: Identifying the body – 1
3-3 Lab: Identifying the body – 2
3-4 Lab: Identifying the body – 3
3-5 Obtain any required samples – introduction
3-6 Obtain any required samples – basic set-up
3-7 Obtain any required samples – blood
3-8 Obtain any required samples – vitreous
3-9 Obtain any required samples – urine
3-10 Obtain any required samples – other
4 – External exam
4-2 General body assessment
4-3 Lab: General body assessment: Body habitus
4-4 Lab: General body assessment: Livor mortis
4-5 Lab: General body assessment: Postmortem change – 1
4-6 Lab: General body assessment: Postmortem change – 2
4-7 Lab: General body assessment – Postmortem change – 3
4-8 Skin – general
4-9 Lab: Get ready to assess your patients – 1
4-10 Lab: Get ready to assess your patients – 2
4-11 Feet
4-12 Lab: Here are your 5 patients to assess: Start with the feet
4-13 Legs
4-14 Lab: Your five patients – assess the legs
4-15 Genitals/groin
4-16 Lab: Your five patients – assess the genitals/groin
4-17 Abdomen
4-18 Lab: Your five patients – assess the abdomen
4-19 Chest
Vocabulary reminder
4-20 Lab: Your five patients – assess the chest
4-21 Neck
4-22 Lab: Your five patients – assess the neck
4-23 Head
4-24 Lab: Your five patients – assess the head
4-25 Arms
4-26 Lab: Your five patients – assess the arms
4-27 Back and buttocks
4-28 Lab: Your five patients – assess the back and buttocks
Tip: Feedback
4-29 Lab: Summary activity
5 – The skin incision – basics
5-2 Take care of yourself. Be comfortable.
5-3 Principles of incision – introduction
5-4 Principles of incision – the law
5-5 Principles of incision – practical guidelines
5-6 Principles of incision – the family
5-7 Y-shaped incision: chest and abdomen
5-8 Y-shaped incision: how deep to cut
5-9 Head incision
5-10 Partial autopsies
6 – After the Y-shaped incision
6-2 Expose the abdominal cavity – basics
6-3 Expose the abdominal cavity – procedure
6-4 Expose the structures of the neck
6-5 Remove the chest plate
6-6 Safety: Protection from sharp ribs
6-7 Survey the chest and abdomen
6-8 Assess any surgical changes that require in situ assessment
7 – After the head incision
7-2 Reflecting the scalp – anterior scalp
7-3 Reflecting the scalp – posterior scalp
7-4 Reflecting the scalp – if the scalp is adherent to the skull
7-5 Lab: Head incision
7-6 Accessing the cranial cavity – reflect the temporalis muscle
7-7 Accessing the cranial cavity – remove the calvarial cap
8 – Before the organs come out
8-2 Take cultures
8-3 Open the pericardial sac
8-4 Check for pulmonary embolism
8-5 Tie off the neck and pelvic arteries — help the funeral director
9 – Taking the organs out
9-2 Common procedures: releasing the neck organs
9-3 Removing the chest block
9-4 Common procedures: removing the bowel
10 – Removing the brain
10-2 Assessing the base of skull, calvarial cap and dura
10-3 Removing the pituitary
11 – Separating the organs
11-2 Tips
12 – Microscopy
13 – Ending the case
13-2 Closing the body
13-3 Safety
13-4 Clean up
13-5 Safety (again!)
13-6 After the case
14 – After the work is done
Assessment
Tip: How do I check if I missed marking any lessons “Complete”?
Assessment – Basic Autopsy Procedure